
User Interfaces – UI and UMG
In this chapter, we will cover the following recipes:
- Drawing using Canvas
- Adding Slate Widgets to the screen
- Creating screen size-aware scaling for the UI
- Displaying and hiding a sheet of UMG elements in-game
- Attaching function calls to Slate events
- Using Data Binding with Unreal Motion Graphics
- Controlling widget appearance with Styles
- Creating a custom SWidget/UWidget
Introduction
Displaying feedback to the player is one of the most important elements within game design, and this will usually involve some sort of HUD, or at least menus, within your game.
In previous versions of Unreal, there was simple HUD support, which allowed you to draw simple shapes and text to the screen. However, it was somewhat limited in terms of aesthetics, and so solutions such as Scaleform became common to work around these limitations. Scaleform leveraged Adobe’s Flash file format to store vector images and UI scripts. It was not without its own cons for developers, though, not least the cost – it was a third-party product requiring a (sometimes, expensive) license.
As a result, Epic developed Slate for the Unreal 4 editor and the in-game UI framework. Slate is a collection of widgets (UI elements) and a framework that allows for a cross-platform interface for the Editor. It is also usable in-game to draw widgets, such as sliders and buttons, for menus and HUDs.
Slate uses declarative syntax to allow for an XML-style representation of user interface elements in their hierarchy in native C++. It accomplishes this by making heavy use of macros and operator overloading.
That said, not everybody wants to ask their programmers to design the game’s HUD. One of the significant advantages of using Scaleform within Unreal 3 was the ability to develop the visual appearance of game UIs using the Flash visual editor so that visual designers didn’t need to learn a programming language. Programmers could then insert the logic and data separately. This is the same paradigm that’s espoused by the Windows Presentation Framework (WPF), for example.
In a similar fashion, Unreal provides Unreal Motion Graphics (UMG). UMG is a visual editor for Slate widgets that allows you to visually style, lay out, and animate user interfaces. UI widgets (or controls, if you’ve come from a Win32 background) can have their properties controlled by either Blueprint code (written in the Graph view of the UMG window) or from C++. This chapter primarily deals with displaying UI elements, creating widget hierarchies, and creating base SWidget classes that can be styled and used within UMG.
Technical requirements
This chapter requires the use of Unreal Engine 4 and uses Visual Studio 2017 as the IDE. Instructions on how to install both pieces of software and the requirements for them can be found in Chapter 1, UE4 Development Tools.
Drawing using Canvas
Canvas is a continuation of the simple HUD that’s implemented within Unreal 3. While it isn’t so commonly used within shipping games, mostly being replaced by Slate/UMG, it’s simple to use, especially when you want to draw text or shapes to the screen. Canvas drawing is still used extensively by console commands that are used for debugging and performance analysis, such as stat game and the other stat commands
Getting ready…
Refer to Chapter 4, Actors and Components, if you need a refresher on using the C++ Code Wizard.
How to do it…
- From your Visual Studio project (File | Open Visual Studio), open the Source\<Module> folder and, from there, open the <Module>.build.cs file (in my case, it would be Source\Chapter_14\Chapter_14.build.cs) . Uncomment/add the following line of code:
using UnrealBuildTool;

public class Chapter_14 : ModuleRules
{
  public Chapter_14(ReadOnlyTargetRules Target) : base(Target)
  {
    PCHUsage = PCHUsageMode.UseExplicitOrSharedPCHs;

    PublicDependencyModuleNames.AddRange(new string[] { "Core",
    "CoreUObject", "Engine", "InputCore" });

    PrivateDependencyModuleNames.AddRange(new string[] { });

    // Uncomment if you are using Slate UI
    PrivateDependencyModuleNames.AddRange(new string[] { "Slate",
    "SlateCore" });

    // Uncomment if you are using online features
    // PrivateDependencyModuleNames.Add("OnlineSubsystem");

    // To include OnlineSubsystemSteam, add it to the plugins section in your uproject file with the Enabled attribute set to true
  }
}
- Create a new GameModeBase called CustomHUDGameMode using the editor class wizard.
- Add a constructor to the class:
#pragma once

#include "CoreMinimal.h"
#include "GameFramework/GameModeBase.h"
#include "CustomHUDGameMode.generated.h"

/**
 *
 */
UCLASS()
class CHAPTER_14_API ACustomHUDGameMode : public AGameModeBase
{
    GENERATED_BODY()

    ACustomHUDGameMode();

};
- Add the following to the constructor implementation:
#include "CustomHUDGameMode.h"
#include "CustomHUD.h"

ACustomHUDGameMode::ACustomHUDGameMode() : AGameModeBase()
{
    HUDClass = ACustomHUD::StaticClass();
}
At this point, you will get compile errors, because the CustomHUD class does not exist. That is what we will be creating next.
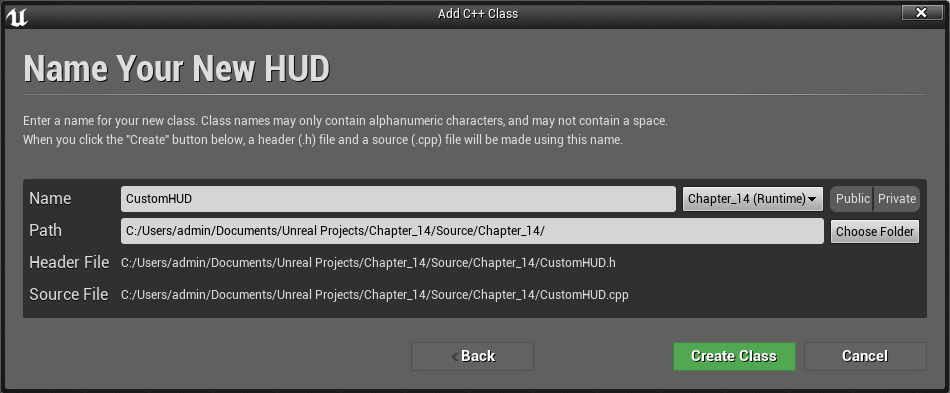
- Create a new HUD subclass using the Add C++ Class wizard:
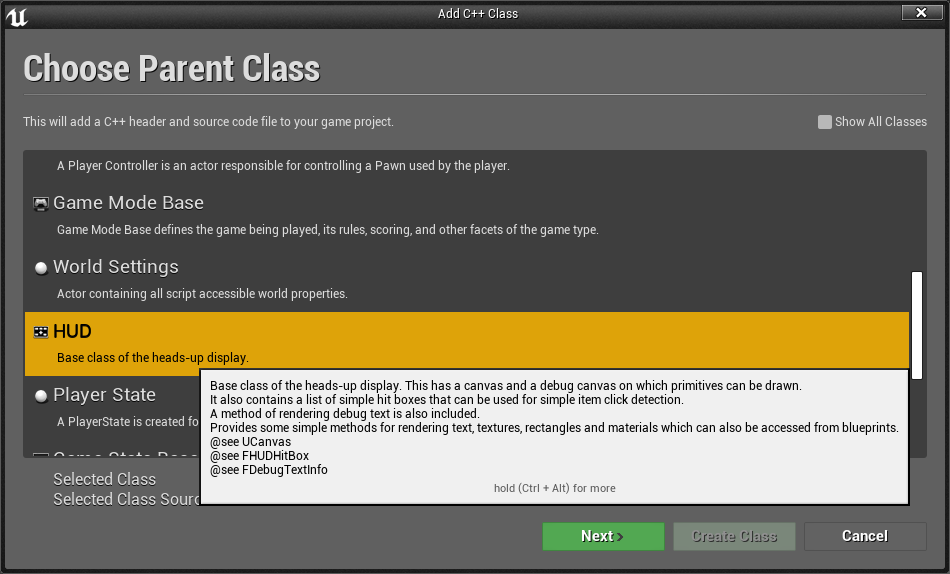
- When asked for the name, put in CustomHUD, and click on the Create Class button:
- Inside CustomHUD.h, add the following function with the override keyword to the class:
#pragma once

#include "CoreMinimal.h"
#include "GameFramework/HUD.h"
#include "CustomHUD.generated.h"

/**
 *
 */
UCLASS()
class CHAPTER_14_API ACustomHUD : public AHUD
{
    GENERATED_BODY()

public:
    virtual void DrawHUD() override;

};
- Now, implement the function:
#include "CustomHUD.h"
#include "Engine/Canvas.h"

void ACustomHUD::DrawHUD()
{
    Super::DrawHUD();
    Canvas->DrawText(GEngine->GetSmallFont(), TEXT("Test string to be printed to screen"), 10, 10);
    FCanvasBoxItem ProgressBar(FVector2D(5, 25), FVector2D(100, 5));
    Canvas->DrawItem(ProgressBar);
    DrawRect(FLinearColor::Blue, 5, 25, 100, 5);
}
- Compile your code and launch the editor.
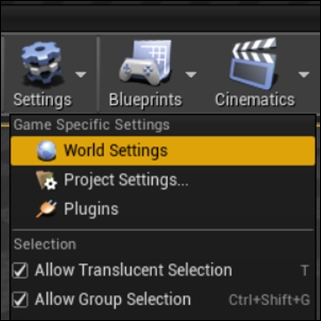
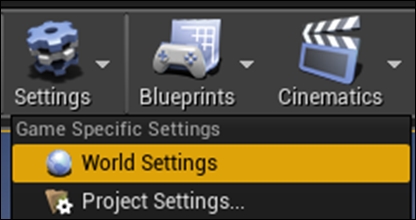
- Within the editor, open the World Settings panel from the Settings drop-down menu:
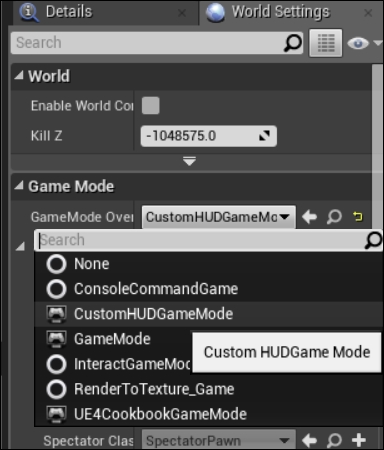
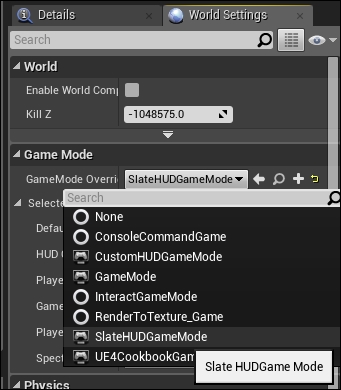
- In the World Settings dialog, select CustomHUDGameMode from the list under GameMode Override:
- Play and verify that your custom HUD is drawing to the screen:

How it works…
All the UI recipes here will be using Slate for drawing, so we need to add a dependency between our module and the Slate framework so that we can access the classes that have been declared in that module. The best place to put custom Canvas draw calls for a game HUD is inside a subclass of AHUD.
To tell the engine to use our custom subclass, though, we need to create a new GameMode and specify the type of our custom class.
Within the constructor of our custom Game Mode, we assign the UClass for our new HUD type to the HUDClass variable. This UClass is passed on to each player’s controller as they spawn in, and the controller is then responsible for the AHUD instance that it creates.
With our custom GameMode loading our custom HUD, we need to actually create said custom HUD class. AHUD defines a virtual function called DrawHUD(), which is invoked in every frame to allow us to draw elements to the screen. As a result, we override that function and perform our drawing inside the implementation.
The first method that’s used is as follows:
float DrawText(constUFont* InFont, constFString&InText,
 float X, float Y, float XScale = 1.f, float YScale = 1.f,
 constFFontRenderInfo&RenderInfo = FFontRenderInfo());
DrawText requires a font to draw with. The default font used by stat and other HUD drawing commands in the engine code is actually stored in the GEngine class, and can be accessed by using the GetSmallFont function, which returns an instance of the UFont as a pointer.
The remaining arguments that we are using are the actual text that should be rendered, and the offset, in pixels, at which the text should be drawn.
DrawText is a function that allows you to directly pass in the data that is to be displayed. The general DrawItem function is a Visitor implementation that allows you to create an object that encapsulates the information about the object to be drawn and reuse that object on multiple draw calls.
In this recipe, we create an element that can be used to represent a progress bar. We encapsulate the required information regarding the width and height of our box into an FCanvasBoxItem, which we then pass to the DrawItem function on our Canvas.
The third item that we draw is a filled rectangle. This function uses convenience methods that are defined in the HUD class rather than on the Canvas itself. The filled rectangle is placed at the same location as our FCanvasBox so that it can represent the current value inside the progress bar.
See also…
- Refer to Chapter 10, Integrating C++ and the Unreal Editor – Part II, and the Creating new console commands recipe within, to learn how to create your own console commands
Adding Slate Widgets to the screen
The previous recipe used the FCanvas API to draw to the screen. However, FCanvas suffers from a number of limitations, for example, animations are difficult to implement, and drawing graphics on the screen involves creating textures or materials. FCanvas also doesn’t implement anything in the way of widgets or window controls, making data entry or other forms of user input more complex than necessary. This recipe will show you how to begin creating HUD elements on-screen using Slate, which provides a number of built-in controls
Getting ready
Add Slate and SlateCore to your module’s dependencies if you haven’t done so already (see the Drawing using Canvas recipe to learn how to do this).
How to do it…
- Create a new PlayerController subclass using the Add C++ Class wizard:

- When asked for the name of the class, type in CustomHUDPlayerController and press the Create Class button:

- Override the BeginPlay virtual method within your new subclass:
#pragma once

#include "CoreMinimal.h"
#include "GameFramework/PlayerController.h"
#include "CustomHUDPlayerController.generated.h"

/**
 *
 */
UCLASS()
class CHAPTER_14_API ACustomHUDPlayerController : public APlayerController
{
    GENERATED_BODY()

public:
    virtual void BeginPlay() override;

};
- Add the following code for your overridden BeginPlay() virtual method inside the subclass’ implementation:
#include "CustomHUDPlayerController.h"
#include "SlateBasics.h"


void ACustomHUDPlayerController::BeginPlay()
{
    Super::BeginPlay();
    TSharedRef<SVerticalBox> widget = SNew(SVerticalBox)
        + SVerticalBox::Slot()
        .HAlign(HAlign_Center)
        .VAlign(VAlign_Center)
        [
            SNew(SButton)
            .Content()
        [
            SNew(STextBlock)
            .Text(FText::FromString(TEXT("Test button")))
        ]
        ];
    GEngine->GameViewport->AddViewportWidgetForPlayer(GetLocalPlayer(), widget, 1);
}
- Create a new class based on GameModeBase called SlateHUDGameMode.
- Add a constructor inside the Game Mode:
#pragma once

#include "CoreMinimal.h"
#include "GameFramework/GameModeBase.h"
#include "SlateHUDGameMode.generated.h"

/**
 *
 */
UCLASS()
class CHAPTER_14_API ASlateHUDGameMode : public AGameModeBase
{
    GENERATED_BODY()

    ASlateHUDGameMode();
};
- Implement the constructor with the following code:
#include "SlateHUDGameMode.h"
#include "CustomHUDPlayerController.h"

ASlateHUDGameMode::ASlateHUDGameMode() : Super()
{
 PlayerControllerClass = ACustomHUDPlayerController::StaticClass();
}
- Within the Editor, open the World Settings menu from the toolbar by going to Settings | World Settings:
- Inside World Settings, override the level’s Game Mode to be our SlateHUDGameMode:
- Play the level. You will see your new UI displayed on the screen:
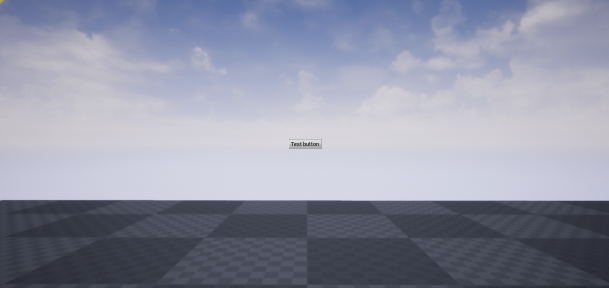
Button located on the game screen
How it works…
For us to reference Slate classes or functions in our code, our module must link with the Slate and SlateCore modules, so we add those to the module dependencies.
We need to instantiate our UI in one of the classes that loads when the game runs, so for this recipe, we use our custom PlayerController in the BeginPlay function as the place to create our UI.
Inside the BeginPlay implementation, we create a new SVerticalBox using the SNew function. We add a slot for a widget to our box, and set that slot to both horizontal and vertical centering.
Inside the slot, which we access using square brackets, we create a button that has Textblock inside it. In Textblock, we set the Text property to a string literal value.
With the UI now created, we call AddViewportWidgetForPlayer to display this widget on the local player’s screen.
With our custom PlayerController ready, we now need to create a custom GameMode to specify that it should use our new PlayerController. With the custom PlayerController being loaded at the start of the game, when BeginPlay is called, our UI will be shown.
The UI is very small at this screen size. Refer to the following recipe for information on how to scale it appropriately for the resolution of the game window.
Post Link: User Interfaces – UI and UMG