Displaying and hiding a sheet of UMG elements in-game
We have already discussed how to add a widget to the viewport, which means that it will be rendered on the player’s screen.
However, what if we want to have UI elements that are toggled based on other factors, such as proximity to certain Actors, or a player holding a key down, or if we want a UI that disappears after a specified time?
How to do it…
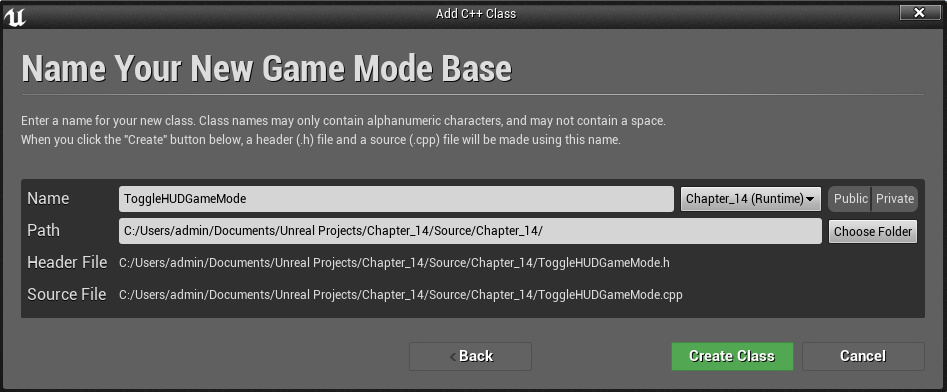
- Create a new GameModeBase class called ToggleHUDGameMode:

- Add the following UPROPERTY and function definitions to the ToggleHUDGameMode.h file:
#pragma once

#include "CoreMinimal.h"
#include "GameFramework/GameModeBase.h"
#include "SlateBasics.h"
#include "ToggleHUDGameMode.generated.h"

UCLASS()
class CHAPTER_14_API AToggleHUDGameMode : public AGameModeBase
{
 GENERATED_BODY()

public:
 UPROPERTY()
 FTimerHandle HUDToggleTimer;

 TSharedPtr<SVerticalBox> widget;

 virtual void BeginPlay() override;
 virtual void EndPlay(const EEndPlayReason::Type EndPlayReason) override;
};
- Implement BeginPlay with the following code in the method body:
void AToggleHUDGameMode::BeginPlay()
{
    Super::BeginPlay();
    widget = SNew(SVerticalBox)
        + SVerticalBox::Slot()
        .HAlign(HAlign_Center)
        .VAlign(VAlign_Center)
        [
            SNew(SButton)
            .Content()
        [
            SNew(STextBlock)
            .Text(FText::FromString(TEXT("Test button")))
        ]
        ];

    auto player = GetWorld()->GetFirstLocalPlayerFromController();

    GEngine->GameViewport->AddViewportWidgetForPlayer(player, widget.ToSharedRef(), 1);

    auto lambda = FTimerDelegate::CreateLambda
    ([this]
    {
        if (this->widget->GetVisibility().IsVisible())
        {
            this->widget->SetVisibility(EVisibility::Hidden);

        }
        else
        {
            this->widget->SetVisibility(EVisibility::Visible);
        }
    });

    GetWorld()->GetTimerManager().SetTimer(HUDToggleTimer, lambda, 5, true);
}
- Implement EndPlay:
void AToggleHUDGameMode::EndPlay(const EEndPlayReason::Type EndPlayReason)
{
    Super::EndPlay(EndPlayReason);
    GetWorld()->GetTimerManager().ClearTimer(HUDToggleTimer);
}
- Compile your code and start the editor.
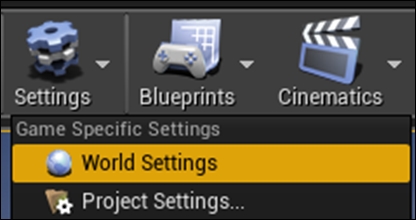
- Within the Editor, open World Settings from the toolbar:

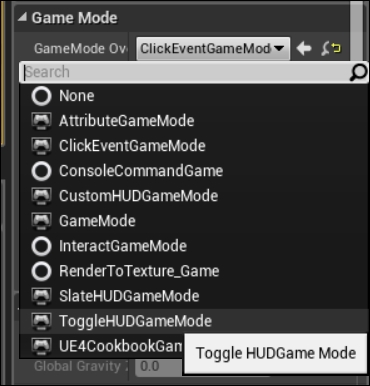
- Inside World Settings, override the level’s Game Mode to be our AToggleHUDGameMode:

- Play the level and verify that the UI toggles its visibility every five seconds.
How it works…
As with most of the other recipes in this chapter, we are using a custom GameMode class to display our single-player UI on the player’s viewport for convenience.
We override BeginPlay and EndPlay so that we can correctly handle the timer that will be toggling our UI on and off for us. To make that possible, we need to store a reference to the timer as a UPROPERTY to ensure it won’t be garbage collected.
Within BeginPlay, we create a new VerticalBox using the SNew macro, and place a button in its first slot. Buttons have Content, which can be some other widget to host inside them, such as SImage or STextBlock.
In this instance, we place an STextBlock into the Content slot. The contents of the text block are irrelevant, that is, as long as they are long enough for us to be able to see our button properly.
Having initialized our widget hierarchy, we add the root widget to the player’s viewport so that it can be seen by them.
Now, we set up a timer to toggle the visibility of our widget. We are using a timer to simplify this recipe rather than having to implement user input and input bindings, but the principle is the same. To do this, we get a reference to the game world and its associated timer manager.
With the timer manager in hand, we can create a new timer. However, we need to actually specify the code to run when the timer expires. One simple way to do this is to use a lambda function for our toggle the hud function.
Lambdas are anonymous functions. Think of them as literal functions. To link a lambda function to the timer, we need to create a timer delegate.
The FTimerDelegate::CreateLambda function is designed to convert a lambda function into a delegate, which the timer can call at the specified interval.
The lambda needs to access the this pointer from its containing object, our GameMode, so that it can change properties on the widget instance that we have created. To give it the access it needs, we begin our lambda declaration with the [] operators, which enclose variables that should be captured into the lambda, and are accessible inside it. The curly braces then enclose the function body in the same way they would with a normal function declaration.
Inside the function, we check if our widget is visible. If it is visible, then we hide it using SWidget::SetVisibility. If the widget isn’t visible, then we turn it on using the same function call.
In the rest of the call to SetTimer, we specify the interval (in seconds) to call the timer, and set the timer to loop.
One thing we need to be careful of, though, is the possibility of our object being destroyed between two timer invocations, potentially leading to a crash if a reference to our object is left dangling. To fix this, we need to remove the timer.
Given that we set the timer during BeginPlay, it makes sense to clear the timer during EndPlay. EndPlay will be called whenever GameMode either ends play or is destroyed, so we can safely cancel the timer during its implementation.
With GameMode set as the default game mode, the UI is created when the game begins to play, and the timer delegate executes every five seconds to switch the visibility of the widgets between true and false.
When you close the game, EndPlay clears the timer reference, avoiding any problems.
Attaching function calls to Slate events
While creating buttons is all well and good, at the moment, any UI element you add to the player’s screen just sits there without anything happening, even if a user clicks on it. We don’t have any event handlers attached to the Slate elements at the moment, so events such as mouse clicks don’t actually cause anything to happen.
Getting ready
This recipe shows you how to attach functions to these events so that we can run custom code when they occur.
How to do it…
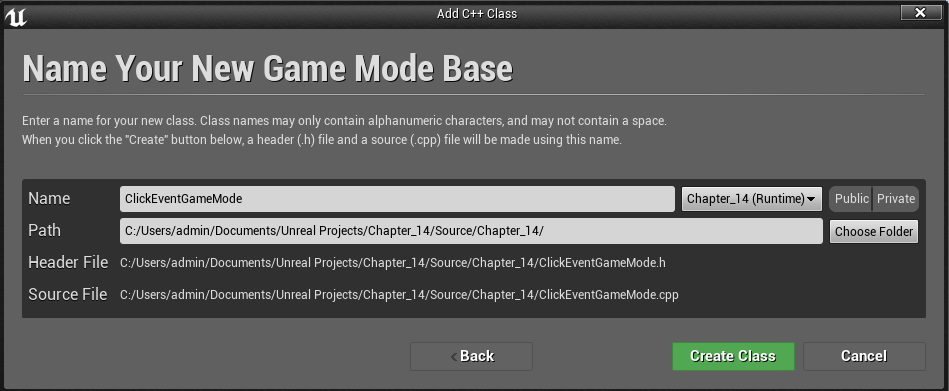
- Create a new GameModeBase subclass called ClickEventGameMode:

- From the ClickEventGameMode.h file, add the following functions and private members to the class:
#pragma once

#include "CoreMinimal.h"
#include "GameFramework/GameModeBase.h"
#include "SlateBasics.h"
#include "ClickEventGameMode.generated.h"

UCLASS()
class CHAPTER_14_API AClickEventGameMode : public AGameModeBase
{
    GENERATED_BODY()

private:
    TSharedPtr<SVerticalBox> Widget;
    TSharedPtr<STextBlock> ButtonLabel;

public:
    virtual void BeginPlay() override;
    FReply ButtonClicked();
};
- Within the .cpp file, add the implementation for BeginPlay:
void AClickEventGameMode::BeginPlay()
{
    Super::BeginPlay();

    Widget = SNew(SVerticalBox)
        + SVerticalBox::Slot()
        .HAlign(HAlign_Center)
        .VAlign(VAlign_Center)
        [
            SNew(SButton)
            .OnClicked(FOnClicked::CreateUObject(this, &AClickEventGameMode::ButtonClicked))
        .Content()
        [
            SAssignNew(ButtonLabel, STextBlock)
            .Text(FText::FromString(TEXT("Click me!")))
        ]
        ];

    auto player = GetWorld()->GetFirstLocalPlayerFromController();

    GEngine->GameViewport->AddViewportWidgetForPlayer(player, Widget.ToSharedRef(), 1);

    GetWorld()->GetFirstPlayerController()->bShowMouseCursor = true;

    auto pc = GEngine->GetFirstLocalPlayerController(GetWorld());

    EMouseLockMode lockMode = EMouseLockMode::DoNotLock;

    auto inputMode = FInputModeUIOnly().SetLockMouseToViewportBehavior(lockMode).SetWidgetToFocus(Widget);

    pc->SetInputMode(inputMode);

}
- Also, add an implementation for ButtonClicked():
FReply AClickEventGameMode::ButtonClicked()
{
    ButtonLabel->SetText(FString(TEXT("Clicked!")));
    return FReply::Handled();
}
- Compile your code and launch the editor.
- Override the game mode in World Settings to be ClickEventGameMode.
- Preview this in the editor and verify that the UI shows a button that changes from Click Me! to Clicked! when you use the mouse cursor to click on it:

Button displays Clicked! after being clicked
How it works…
As with most of the recipes in this chapter, we use GameMode to create and display our UI to minimize the number of classes that are extraneous to the point of the recipe that you need to create.
Within our new game mode, we need to retain references to the Slate Widgets that we create so that we can interact with them after their creation.
As a result, we create two shared pointers as member data within our GameMode – one to the overall parent or root widget of our UI, and the other to the label on our button, because we’re going to be changing the label text at runtime later.
We override BeginPlay, as it is a convenient place to create our UI after the game has started, and we will be able to get valid references to our player controller.
We also create a function called ButtonClicked. It returns FReply, a struct indicating if an event was handled. The function signature for ButtonClicked is determined by the signature of FOnClicked, a delegate that we will be using in a moment.
Inside our implementation of BeginPlay, the first thing we do is call the implementation we are overriding to ensure that the class is initialized appropriately.
Then, as usual, we use our SNew function to create VerticalBox, and we add a slot to it, which is centered.
We create a new Button inside that slot, and we add a value to the OnClicked attribute that the button contains.
OnClicked is a delegate property. This means that the Button will broadcast the OnClicked delegate any time a certain event happens (as the name implies in this instance, when the button is clicked).
To subscribe or listen to the delegate, and be notified of the event that it refers to, we need to assign a delegate instance to the property.
We do that using the standard delegate functions such as CreateUObject, CreateStatic, or CreateLambda. Any of those will work – we can bind UObject member functions, static functions, lambdas, and other functions.
Check out Chapter 5, Handling Events and Delegates, to learn more about delegates and look at the other types of functions that we can bind to delegates.
CreateUObject expects a pointer to a class instance, and a pointer to the member function that’s defined in that class to call. The function has to have a signature that can be converted into the signature of the delegate:
/** The delegate to execute when the button is clicked */
 FOnClickedOnClicked;
As we can see, the OnClicked delegate type is FOnClicked – this is why the ButtonClicked function that we declared has the same signature as FOnClicked.
By passing in a pointer to this, and the pointer to the function to invoke, the engine will call that function on this specific object instance when the button is clicked.
After setting up the delegate, we use the Content() function, which returns a reference to the single slot that the button has for any content that it should contain.
We then use SAssignNew to create our button’s label by using the TextBlock widget. SAssignNew is important because it allows us to use Slate’s declarative syntax, and yet assigns variables to point to specific child widgets in the hierarchy. SAssignNew’s first argument is the variable that we want to store the widget in, and the second argument is the type of that widget.
With ButtonLabel now pointing at our button’s TextBlock, we can set its Text attribute to a static string.
Finally, we add the widget to the player’s viewport using AddViewportWidgetForPlayer, which expects, as parameters, LocalPlayer to add the widget to, the widget itself, and a depth value (higher values to the front).
To get the LocalPlayer instance, we assume we are running without split screen, and so the first player controller will be the only one, that is, the player’s controller. The GetFirstLocalPlayerFromController function is a convenience function that simply fetches the first player’s controller and returns its local player object.
We also need to focus the widget so that the player can click on it and display a cursor so that the player knows where their mouse is on the screen.
We know from the previous step that we can assume the first local player controller is the one we’re interested in, so we can access it and change its ShowMouseCursor variable to true. This will cause the cursor to be rendered on screen.
SetInputMode allows us to focus on a widget so that the player can interact with it among other UI-related functionality, such as locking the mouse to the game’s viewport. It uses an FInputMode object as its only parameter, which we can construct with the specific elements that we wish to include by using the builder pattern.
The FInputModeUIOnly class is an FInputMode subclass that specifies that we want all input events to be redirected to the UI layer rather than the player controller and other input handling.
The builder pattern allows us to chain the method calls to customize our object instance before it is sent into the function as the parameter.
We chain SetLockMouseToViewport(false) to specify that the player’s mouse can leave the boundary of the game screen with SetWidgetToFocus(Widget), which specifies our top-level widget as the one that the game should direct player input to.
Finally, we have our actual implementation for ButtonClicked, which is our event handler. When the function is run due to our button being clicked, we change our button’s label to indicate it has been clicked. We then need to return an instance of FReply to the caller to let the UI framework know that the event has been handled, and to not continue propagating the event back up the widget hierarchy.
FReply::Handled() returns FReply set up to indicate this to the framework. We could have used FReply::Unhandled(), but this would have told the framework that the click event wasn’t actually the one we were interested in, and it should look for other objects that might be interested in the event instead.
Post Link: Displaying and hiding a sheet of UMG elements in-game
