
Creating a custom SWidget/UWidget
The recipes in this chapter so far have shown you how to create UIs using the existing primitive widgets.
Sometimes, it is convenient for developers to use composition to collect a number of UI elements to define a button class that automatically has a TextBlock as a label rather than manually specifying the hierarchy every time they are declared, for example.
Furthermore, if you are manually specifying the hierarchy in C++, rather than declaring a compound object consisting of subwidgets, you won’t be able to instantiate those widgets as a group using UMG.
Getting ready
This recipe shows you how to create a compound SWidget that contains a group of widgets and exposes new properties to control elements of those subwidgets. It will also show you how to create a UWidget wrapper, which will expose the new compound SWidget class to UMG so that it can be used by designers.
This recipe shows you how to create a compound SWidget that contains a group of widgets and exposes new properties to control elements of those subwidgets. It will also show you how to create a UWidget wrapper, which will expose the new compound SWidget class to UMG so that it can be used by designers.
How to do it…
- We need to add the UMG module to our module’s dependencies.
- Open up <YourModule>.build.cs, which in our case is Chapter_14.Build.cs, and add UMG to the following code:
using UnrealBuildTool;

public class Chapter_14 : ModuleRules
{
  public Chapter_14(ReadOnlyTargetRules Target) : base(Target)
  {
    PCHUsage = PCHUsageMode.UseExplicitOrSharedPCHs;

    PublicDependencyModuleNames.AddRange(new string[] { "Core", "CoreUObject", "Engine", "InputCore" });

    PrivateDependencyModuleNames.AddRange(new string[] { });

    // Uncomment if you are using Slate UI
    PrivateDependencyModuleNames.AddRange(new string[] { "Slate",
    "SlateCore", "UMG" });

    // Uncomment if you are using online features
    // PrivateDependencyModuleNames.Add("OnlineSubsystem");

    // To include OnlineSubsystemSteam, add it to the plugins
    // section in your uproject file with the Enabled attribute
    // set to true
  }
}
- Create a new class based on the Slate Widget parent class (SCompoundWidget):

- When asked for a name, call it CustomButton.
- Once created, add the following code to its declaration:
#pragma once

#include "CoreMinimal.h"
#include "Widgets/SCompoundWidget.h"

class CHAPTER_14_API SCustomButton : public SCompoundWidget
{
    SLATE_BEGIN_ARGS(SCustomButton)
        : _Label(TEXT("Default Value"))
        , _ButtonClicked()
    {}
    SLATE_ATTRIBUTE(FString, Label)
        SLATE_EVENT(FOnClicked, ButtonClicked)
        SLATE_END_ARGS()

public:
    void Construct(const FArguments& InArgs);
    TAttribute<FString> Label;
    FOnClicked ButtonClicked;
};
- Implement the class with the following in the corresponding .cpp file:
#include "CustomButton.h"
#include "SlateOptMacros.h"
#include "Chapter_14.h"


void SCustomButton::Construct(const FArguments& InArgs)
{
    Label = InArgs._Label;
    ButtonClicked = InArgs._ButtonClicked;
    ChildSlot.VAlign(VAlign_Center)
        .HAlign(HAlign_Center)
        [SNew(SButton)
        .OnClicked(ButtonClicked)
        .Content()
        [
            SNew(STextBlock)
            .Text_Lambda([this] {return FText::FromString(Label.Get()); })
        ]
        ];
}
- Create a second class, this time based on Widget:
- Call this new class CustomButtonWidget and press Create Class.
- Add the bold code in the following snippet to the CustomButtonWidget.h file:
#pragma once

#include "CoreMinimal.h"
#include "Components/Widget.h"
#include "CustomButton.h"
#include "SlateDelegates.h"
#include "CustomButtonWidget.generated.h"

DECLARE_DYNAMIC_DELEGATE_RetVal(FString, FGetString);
DECLARE_DYNAMIC_MULTICAST_DELEGATE(FButtonClicked);

UCLASS()
class CHAPTER_14_API UCustomButtonWidget : public UWidget
{
    GENERATED_BODY()

protected:
    TSharedPtr<SCustomButton> MyButton;

    virtual TSharedRef<SWidget> RebuildWidget() override;

public:
    UCustomButtonWidget();
    //multicast
    UPROPERTY(BlueprintAssignable)
    FButtonClicked ButtonClicked;

    FReply OnButtonClicked();

    UPROPERTY(BlueprintReadWrite, EditAnywhere)
        FString Label;

    //MUST be of the form varnameDelegate
    UPROPERTY()
        FGetString LabelDelegate;

    virtual void SynchronizeProperties() override;
};
- Now, create the implementation for UCustomButtonWidget:
#include "CustomButtonWidget.h"
#include "Chapter_14.h"

TSharedRef<SWidget> UCustomButtonWidget::RebuildWidget()
{
    MyButton = SNew(SCustomButton)
        .ButtonClicked(BIND_UOBJECT_DELEGATE(FOnClicked, OnButtonClicked));
    return MyButton.ToSharedRef();
}

UCustomButtonWidget::UCustomButtonWidget()
    :Label(TEXT("Default Value"))
{

}

FReply UCustomButtonWidget::OnButtonClicked()
{
    ButtonClicked.Broadcast();
    return FReply::Handled();
}


void UCustomButtonWidget::SynchronizeProperties()
{
    Super::SynchronizeProperties();
    TAttribute<FString> LabelBinding = OPTIONAL_BINDING(FString, Label);
    MyButton->Label = LabelBinding;
}
- Save your scripts and compile your code.
- Create a new Widget Blueprint by right-clicking on the Content Browser and selecting User Interface and then Widget Blueprint:
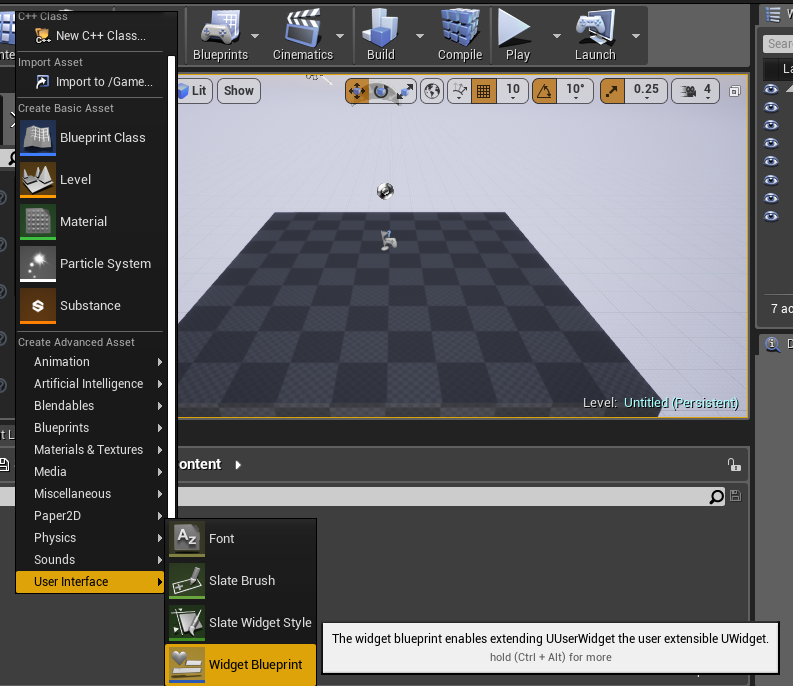
You can use the mouse wheel in the context menu to scroll to the User Interface section.
- Open your new Widget Blueprint by double-clicking on it.
- Find the Custom Button Widget in the Widget Palette:
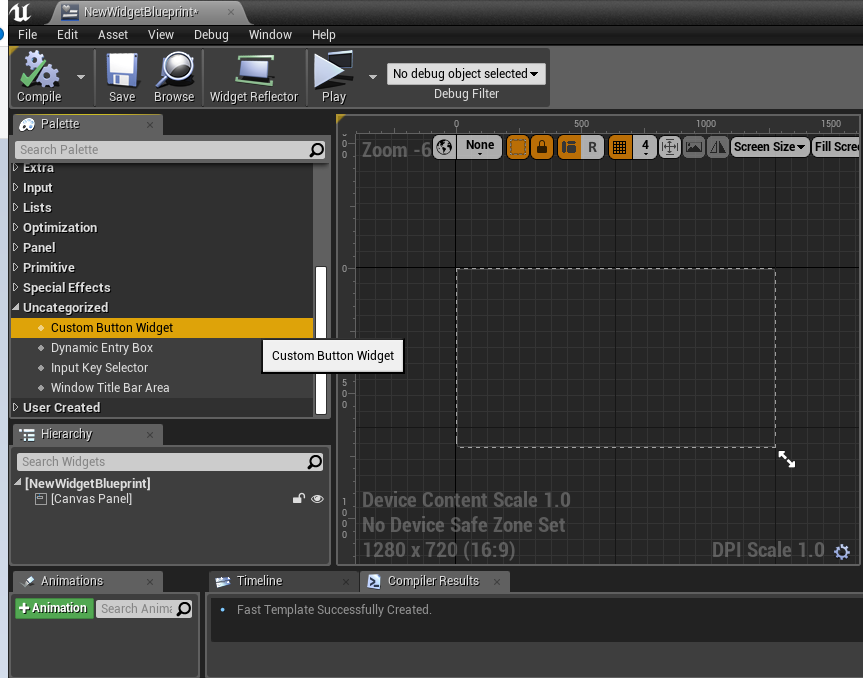
- Drag an instance of it out into the main area.
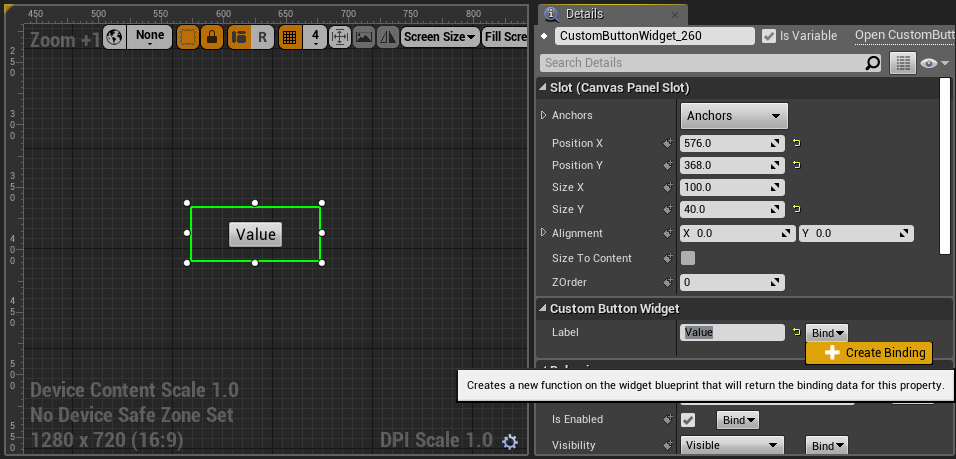
- With the instance selected, change the Label property in the Details panel:
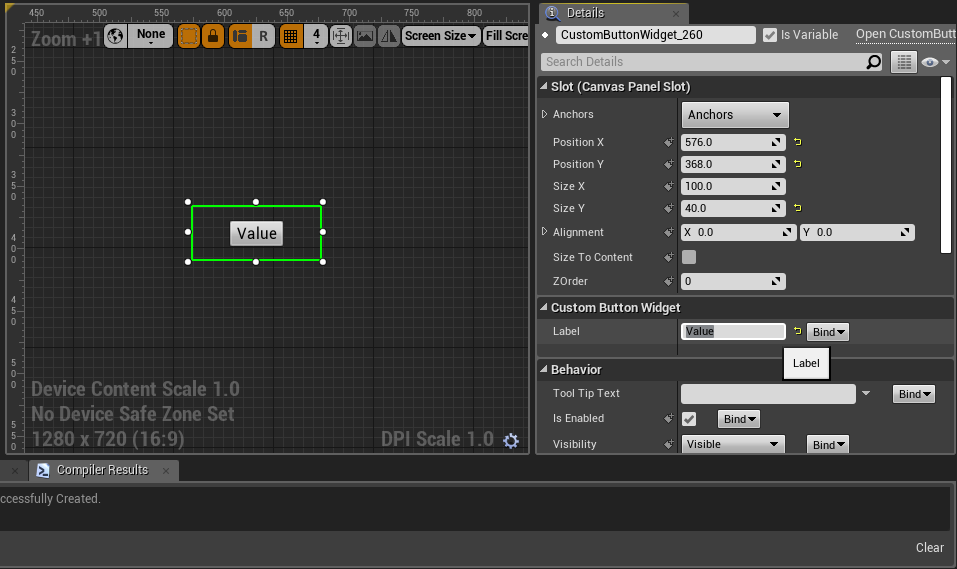
Verify that your button has changed its label.
- Now, we will create a binding to demonstrate that we can link arbitrary blueprint functions to the label property on our widget, which, in turn, drives the Widget’s textblock label.
- Click on Bind to the right of the Label property and select Create Binding:
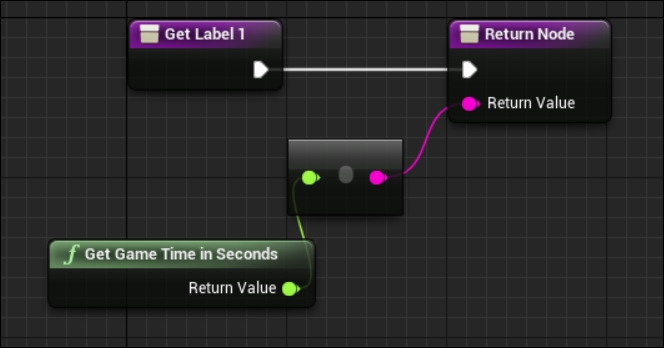
- Within the graph that is now displayed, place a Get Game Time in Seconds node by right-clicking within the main area:

- Link the return value from the Get Game Time node to the Return Value pin in the function:

- A Convert Float to String node will be automatically inserted for you:
- Compile the blueprint to ensure it is working correctly.
- Next, open the Level Blueprints by clicking on the Blueprints button on the taskbar and then selecting Open Level Blueprint:

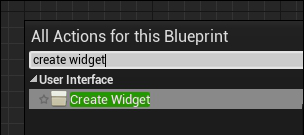
- To the right of the Event BeginPlay node, place a Create Widget node into the graph:
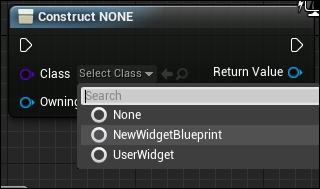
- Select the Class of widget to spawn it as the new Widget Blueprint that we created a moment ago within the editor:
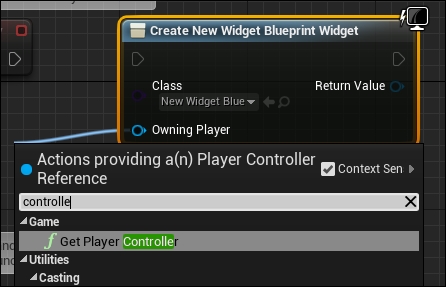
- Click and drag away from the Owning Player pin on the create widget node and place a Get Player Controller node:
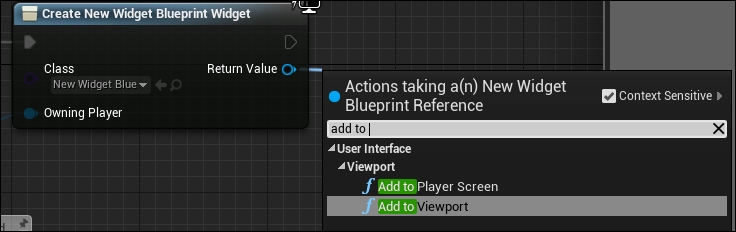
- Likewise, drag away from the return value of the Create Widget node and place an Add to Viewport node:
- Lastly, link the BeginPlay node to the execution pin on the create widget node:
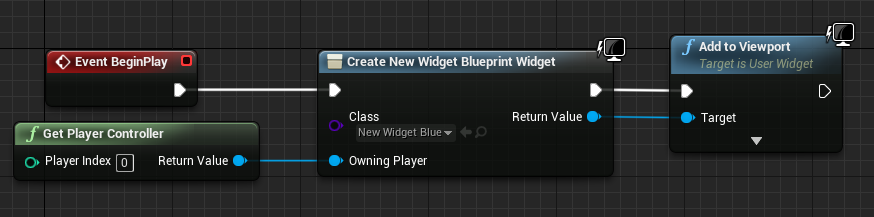
- Preview your game and verify that the widget we’ve displayed onscreen is our new custom button, with its label bound to the number of seconds that have elapsed since the game started:

Button displaying the elapsed time in the level
How it works…
To use the UWidget class, our module needs to include the UMG module as one of its dependencies, because UWidget is defined inside the UMG module.
The first class that we need to create, however, is our actual SWidget class.
Because we want to aggregate two widgets together into a compound structure, we create our new widget as a CompoundWidget subclass. CompoundWidget allows you to encapsulate a widget hierarchy as a widget itself.
Inside the class, we use the SLATE_BEGIN_ARGS and SLATE_END_ARGS macros to declare an internal struct called FArguments on our new SWidget. Within SLATE_BEGIN_ARGS and SLATE_END_ARGS, the SLATE_ATTRIBUTE and SLATE_EVENT macros are used. SLATE_ATTRIBUTE creates TAttribute for the type we give it. In this class, we declare a TAttribute called _Label, which is more specifically a TAttribute<FString>.
SLATE_EVENT allows us to create member delegates that we can broadcast when something happens internally to the widget.
In SCustomButton, we declare a delegate with the signature FOnClicked, called ButtonClicked.
SLATE_ARGUMENT is another macro (which wasn’t used in this recipe) that creates an internal variable with the type and name you provide, appending an underscore to the start of the variable name.
Construct() is the function that widgets implement to self-initialize when they are being instantiated. You’ll notice we also create TAttribute and FOnClicked instances ourselves, without the underscores. These are the actual properties of our object into which the arguments that we declared earlier will be copied.
Inside the implementation of Construct, we retrieve the arguments that were passed to us in the FArgumentsstruct, and store them inside our actual member variables for this instance.
We assign Label and ButtonClicked based on what was passed in, and then we actually create our widget hierarchy. We use the same syntax as usual for this with one thing to note, namely the use of Text_Lambda to set the text value of our internal text block. We use a lambda function to retrieve the value of our Label TAttribute using Get(), convert it into FText, and store it as our text block’s Text property.
Now that we have our SWidget declared, we need to create a wrapper UWidget object that will expose this widget to the UMG system so that designers can use the widget within the WYSIWYG editor. This class will be called UCustomButtonWidget, and it inherits from UWidget rather than SWidget.
The UWidget object needs a reference to the actual SWidget that it owns, so we place a protected member in the class that will store it as a shared pointer.
A constructor is declared, as well as a ButtonClicked delegate that can be set in Blueprint. We also mirror a Label property that is marked as BlueprintReadWrite so that it can be set in the UMG editor.
Because we want to be able to bind our button’s label to a delegate, we add the last of our member variables, which is a delegate that returns a String.
The SynchronizeProperties function applies properties that have been mirrored in our UWidget class across to the SWidget that we are linked with.
RebuildWidget reconstructs the native widget that UWidget is associated with. It uses SNew to construct an instance of our SCustomButton widget, and uses the Slate declarative syntax to bind the UWidget’s OnButtonClicked method to the ButtonClicked delegate inside the native widget. This means that when the native widget is clicked, the UWidget will be notified by having OnButtonClicked called.
OnButtonClicked re-broadcasts the clicked event from the native button via the UWidget’s ButtonClicked delegate. This means that UObjects and the UMG system can be notified of the button being clicked without having a reference to the native button widget themselves. We can bind to UCustomButtonWidget::ButtonClicked so that we’re notified about this.
OnButtonClicked then returns FReply::Handled() to indicate that the event does not need to propagate further. Inside SynchronizeProperties, we call the parent method to ensure that any properties in the parent are also synchronized properly.
We use the OPTIONAL_BINDING macro to link the LabelDelegate delegate in our UWidget class to TAttribute, and, in turn, the native button’s label. It is important to note that the OPTIONAL_BINDING macro expects the delegate to be called NameDelegate based on the second parameter to the macro.
OPTIONAL_BINDING allows the value to be overridden by a binding made via UMG, but only if the UMG binding is valid.
This means that when UWidget is told to update itself, for example, because the user customizes a value in the Details panel within UMG, it will recreate the native SWidget if necessary, and then copy the values set in Blueprint/UMG via SynchronizeProperties so that everything continues to work as expected.
Post Link: Creating a custom SWidget/UWidget